使用GOOGLE的API,萬法不離宗,就是要申請API KEY,
所以到Google Cloud Platform 新增專案
https://console.developers.google.com
建立完成後畫面如下,接下來點選啟用API和服務

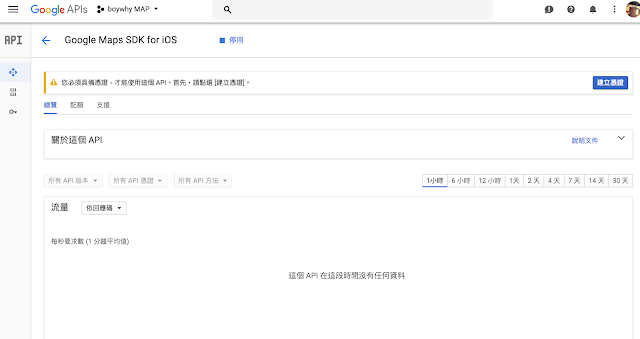
點選Google Map for iOS

啟用

建立憑證
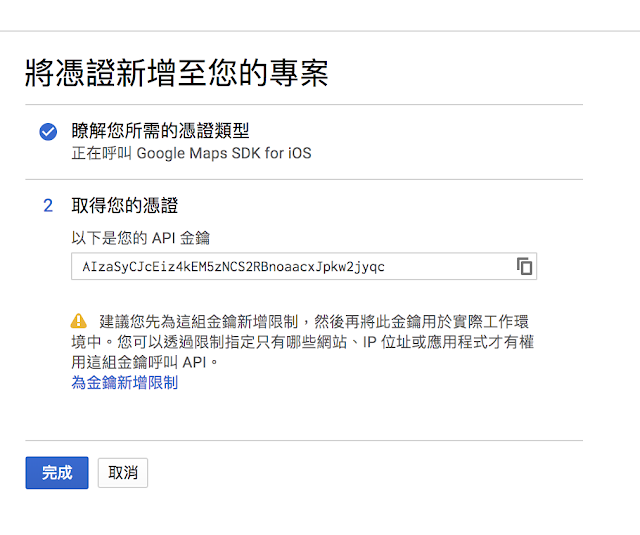
點選"我需要那些憑證?"

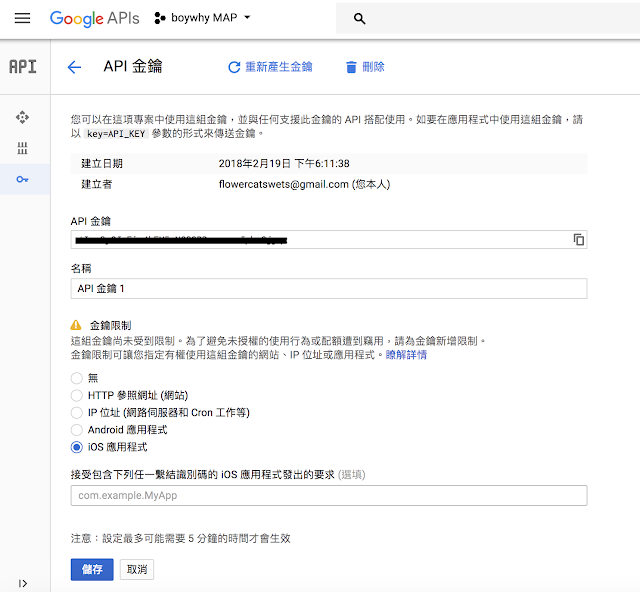
點選"為金鑰新增限制"保護你的KEY不被預期之外的程序呼叫
如果你有要限定某一款iOS APP 才能呼叫,記得在com.example.MyAPP填入
金鑰這樣就申請好囉
接下來記住你的金鑰,進入軟體部份了,如果您沒安裝過
CocoaPods 需要先安裝,否則
請跳過安裝這一步,記得要是Xcode 8 or 9 ,請在終端機打上以下內容
sudo gem install cocoapods
等待安裝完成。
接下來我們要開啟一個Xcode專案

當專案建立完畢後,關閉專案及Xcode,回到終端機,進入專案根目錄下
cd MapDemo/
接下來要安裝GOOGLE MAP SDK,首先初始化一下cocoa pods 需要的設定檔
pod init
接下來編輯設定檔
vi Podfile
設定檔一開始長這樣
# Uncomment the next line to define a global platform for your project
# platform :ios, '9.0'

target 'MapDemo' do
  # Comment the next line if you're not using Swift and don't want to use dynamic frameworks
  use_frameworks!

  # Pods for MapDemo

  target 'MapDemoTests' do
    inherit! :search_paths
    # Pods for testing
  end

  target 'MapDemoUITests' do
    inherit! :search_paths
    # Pods for testing
  end

end
~
加入GOOGLE MAP SDK,主要有三行
source 'https://github.com/CocoaPods/Specs.git'
及
pod 'GoogleMaps'
pod 'GooglePlaces'
# Uncomment the next line to define a global platform for your project
# platform :ios, '9.0'
source 'https://github.com/CocoaPods/Specs.git'
target 'MapDemo' do
  # Comment the next line if you're not using Swift and don't want to use dynamic frameworks
  use_frameworks!
  pod 'GoogleMaps'
  pod 'GooglePlaces'
  # Pods for MapDemo

  target 'MapDemoTests' do
    inherit! :search_paths
    # Pods for testing
  end

  target 'MapDemoUITests' do
    inherit! :search_paths
    # Pods for testing
  end

end


# Uncomment the next line to define a global platform for your project
# platform :ios, '9.0'

target 'MapDemo' do
  # Comment the next line if you're not using Swift and don't want to use dynamic frameworks
  use_frameworks!

  # Pods for MapDemo

  target 'MapDemoTests' do
    inherit! :search_paths
    # Pods for testing
  end

  target 'MapDemoUITests' do
    inherit! :search_paths
    # Pods for testing
  end

end
~
接下來存檔,然候開始安裝SDK囉,視網路情況,可能需要一點時間喔。
pod install
安裝過程如下
Analyzing dependencies
Downloading dependencies
Installing GoogleMaps (2.5.0)
Installing GooglePlaces (2.5.0)
Generating Pods project
Integrating client project
[!] Please close any current Xcode sessions and use `MapDemo.xcworkspace` for this project from now on.
Sending stats
Pod installation complete! There are 2 dependencies from the Podfile and 2 total pods installed.
[!] Automatically assigning platform ios with version 10.2 on target MapDemo because no platform was specified. Please specify a platform for this target in your Podfile. See `https://guides.cocoapods.org/syntax/podfile.html#platform`.
接下來用指令啟動xocde
open MapDemo.xcworkspace
安裝成功的話你會發現專案多了一個Pods

在AppDelegate.swift 加入
import GoogleMaps

接下來在application(_:didFinishLaunchingWithOptions:) 方法中填入你的API KEY(金鑰)
GMSServices.provideAPIKey("YOUR_API_KEY")

接下來把Main.storyboard的View的Class改成GMSMapView

接著在ViewController.swift中加入
import GoogleMaps 以及以下程式碼
override func loadView() {
// Create a GMSCameraPosition that tells the map to display the
// coordinate -33.86,151.20 at zoom level 6.
let camera = GMSCameraPosition.camera(withLatitude: -33.86, longitude: 151.20, zoom: 6.0)
let mapView = GMSMapView.map(withFrame: CGRect.zero, camera: camera)
mapView.isMyLocationEnabled = true
view = mapView
// Creates a marker in the center of the map.
let marker = GMSMarker()
marker.position = CLLocationCoordinate2D(latitude: -33.86, longitude: 151.20)
marker.title = "Sydney"
marker.snippet = "Australia"
marker.map = mapView
}
完整ViewController.swift如下

接著在Info.plist中加入
Google Maps SDK for iOS 使用的 URL 配置

或是用UI介面編輯

接下來就可以開啟模擬器執行看看地圖會不會出來囉,地點會在雪梨

接下來我們試著顯示自己位置看看,此時我們會需要再加入一個NSLocationAlwaysUsageDescription 到Info.plis 提示用戶需要位置權限的字串

接下來我們改一下程式碼如下
import UIKit
import GoogleMaps
class YourViewController: UIViewController {

  // You don't need to modify the default init(nibName:bundle:) method.

  override func loadView() {
    // Create a GMSCameraPosition that tells the map to display the
    // coordinate -33.86,151.20 at zoom level 6.
    let camera = GMSCameraPosition.camera(withLatitude: -33.86, longitude: 151.20, zoom: 6.0)
    let mapView = GMSMapView.map(withFrame: CGRect.zero, camera: camera)
    mapView.isMyLocationEnabled = true
    view = mapView

    // Creates a marker in the center of the map.
    let marker = GMSMarker()
    marker.position = CLLocationCoordinate2D(latitude: -33.86, longitude: 151.20)
    marker.title = "Sydney"
    marker.snippet = "Australia"
    marker.map = mapView
  }
}
//
//  ViewController.swift
//  MapDemo
//
//  Created by boywhy chen on 2018/2/20.
//  Copyright © 2018年 qq. All rights reserved.
//

import UIKit
import GoogleMaps

class ViewController: UIViewController,CLLocationManagerDelegate {
    var locationManager = CLLocationManager()
    var currentLocation: CLLocation?
    var mapView: GMSMapView!
    var zoomLevel: Float = 15.0
    override func viewDidLoad() {
        super.viewDidLoad()
        // Do any additional setup after loading the view, typically from a nib.
    }

    override func didReceiveMemoryWarning() {
        super.didReceiveMemoryWarning()
        // Dispose of any resources that can be recreated.
    }

    override func loadView() {
        locationManager = CLLocationManager()
        locationManager.desiredAccuracy = kCLLocationAccuracyBest
        locationManager.requestAlwaysAuthorization()
        locationManager.distanceFilter = 50
        locationManager.startUpdatingLocation()
        locationManager.delegate = self


        //init MapView
        let camera = GMSCameraPosition.camera(withLatitude: -33.86, longitude: 151.20, zoom: 6.0)

        mapView = GMSMapView.map(withFrame: CGRect.zero, camera: camera)

        mapView.isMyLocationEnabled = true

        view = mapView
    }

    // Handle incoming location events.
    func locationManager(_ manager: CLLocationManager, didUpdateLocations locations: [CLLocation]) {
        let location: CLLocation = locations.last!
        print("Location: \(location)")

        let camera = GMSCameraPosition.camera(withLatitude: location.coordinate.latitude,
                                              longitude: location.coordinate.longitude,
                                              zoom: zoomLevel)

        if mapView.isHidden {
            mapView.isHidden = false
            mapView.camera = camera
        } else {
            mapView.animate(to: camera)
        }


    }

    // Handle authorization for the location manager.
    func locationManager(_ manager: CLLocationManager, didChangeAuthorization status: CLAuthorizationStatus) {
        switch status {
        case .restricted:
            print("Location access was restricted.")
        case .denied:
            print("User denied access to location.")
            // Display the map using the default location.
            mapView.isHidden = false
        case .notDetermined:
            print("Location status not determined.")
        case .authorizedAlways: fallthrough
        case .authorizedWhenInUse:
            print("Location status is OK.")
        }
    }

    // Handle location manager errors.
    func locationManager(_ manager: CLLocationManager, didFailWithError error: Error) {
        locationManager.stopUpdatingLocation()
        print("Error: \(error)")
    }
}
主要是增加定位功能,接下來執行會要求權限,按下Allow

如果是用模擬器的話,可以選置以下幾種方式模擬位置
APPLE ,定位在APPLE總部


Custom Location 則是自己輸入經緯度


City Bike Ride ,City Run
其實是類似功能,只是移動速度不太一樣以及移動路徑不太相同

Freeway Driver 則是模擬在高速公路開車

參考文件
https://developers.google.com/maps/documentation/ios-sdk/map?hl=zh-tw
https://developers.google.com/maps/documentation/ios-sdk/current-places-tutorial?hl=zh-tw
https://stackoverflow.com/questions/24062509/location-services-not-working-in-ios-8


